How can we help?
Using Windows Task Scheduler to execute reports
Setup DSStudio Reports to execute with Windows Task Scheduler
Depending upon the report parameter requirements you can schedule DSStudio Reports to run on a specific schedule. Once you setup the Task Scheduler your report or export will execute unattended for the time frame you set.
Let’s walk through creating our Sage 50 Audit Report to generate every day at 11:00 pm.
First, we need to get some information about the DSStudio Viewer and the DSStudio Report we want to execute.
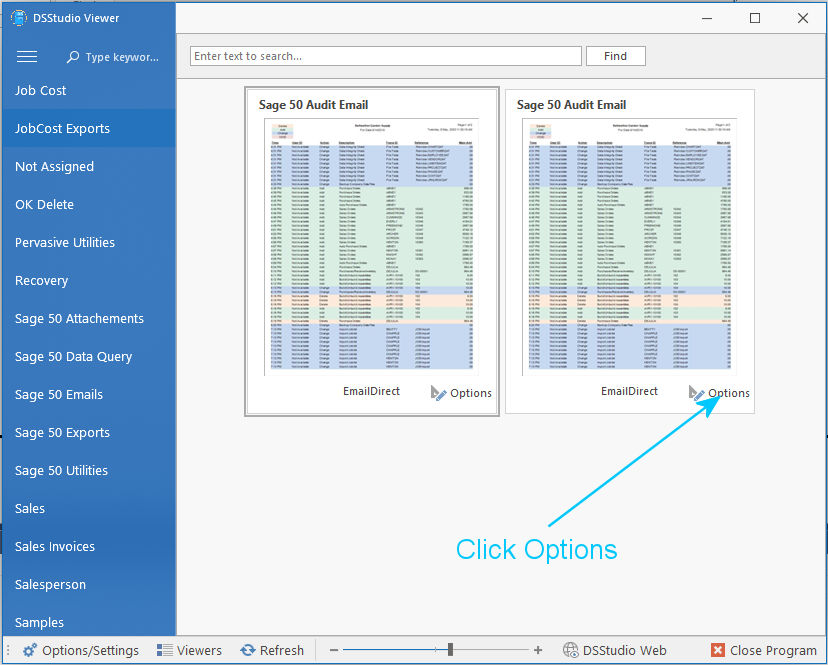
![]() Open DSStudio Viewer and find your report. Click on the Options button in the lower right corner of the report.
Open DSStudio Viewer and find your report. Click on the Options button in the lower right corner of the report.
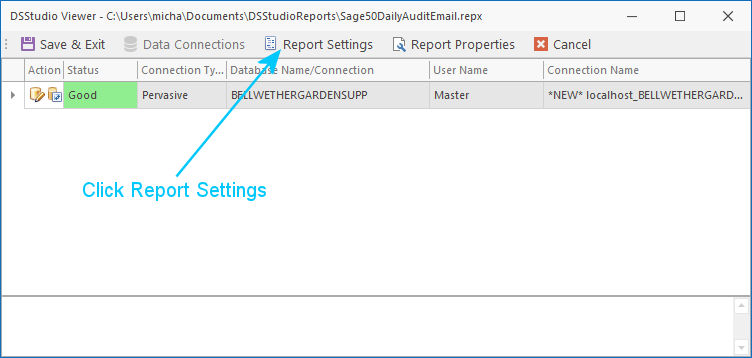
 Next click the Report Settings option.
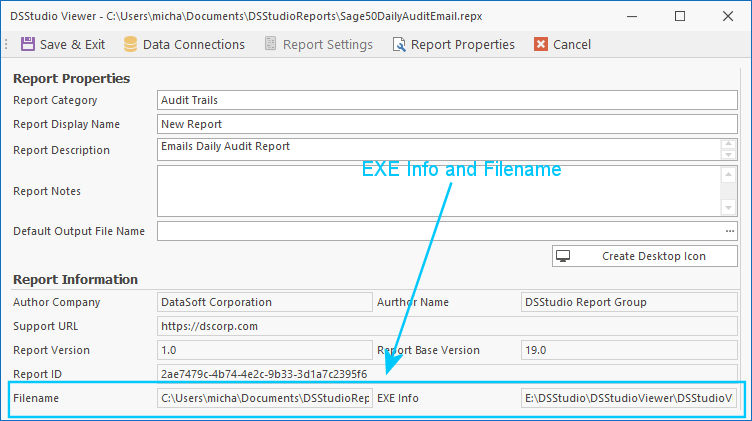
On the bottom of the screen, you will see two pieces of information that we need. The EXE Info and the File Name. Both of these areas will allow you to use <Ctrl> a (select all) and <Ctrl> c to copy them. Lets first click the EXE Info area and press <Ctrl> a then <Ctrl> c. Keep this window open as we will later need to do get the Filename.
 We now need to start the Windows Task Scheduler. This can be done in multiple ways. One way is to press the Windows Key and enter Task Scheduler into the Search Box and select Task Scheduler.
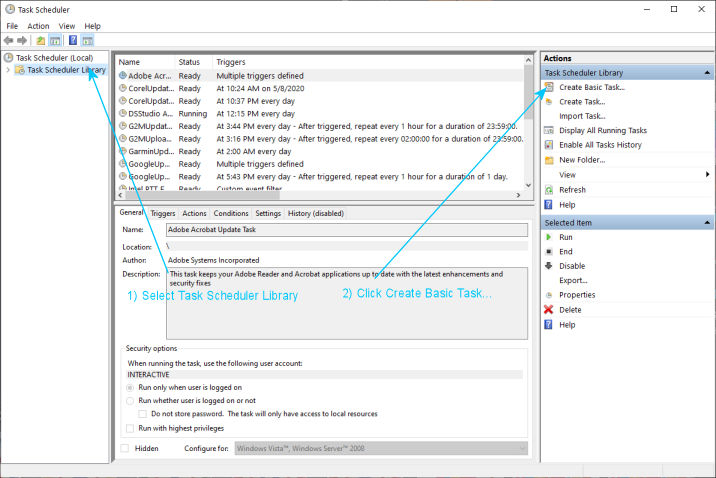
 First, click on the Task Scheduler Library on the left to highlight it. Then select Create Basic Task… on the right of the screen.
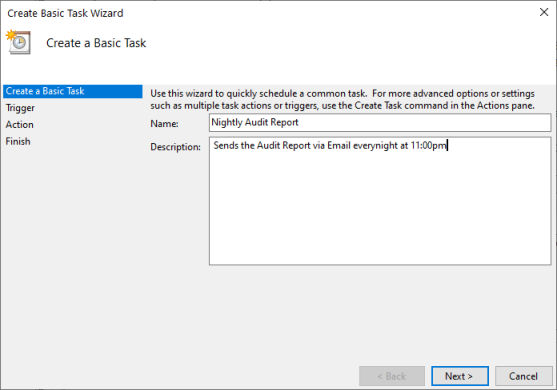
 The above is only an example. Depending upon what report you want to execute please change the fields above.
Click Next > to go to the next screen.gs.
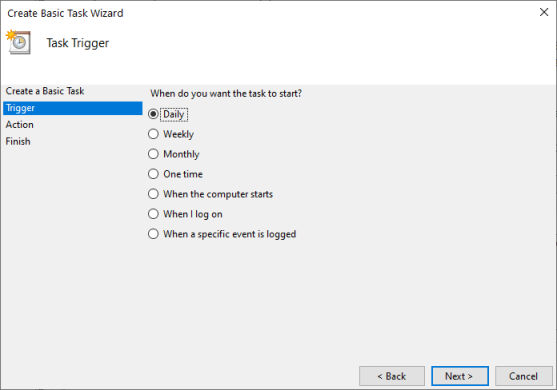
 For our example, we are going to run this report Daily.
Click Next > to go to the next screen.
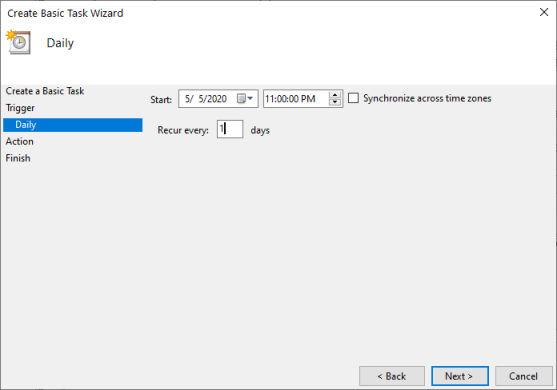
 In our example we want the report to run every day at 11:00 pm. Complete this screen and Click Next > to go to the next screen.
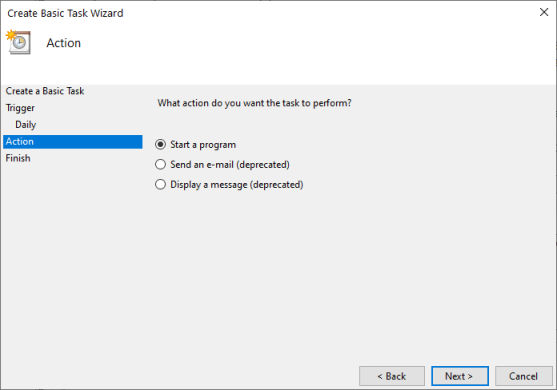
 Nothing needed to change on the screen above. Click Next > to go to the next screen.
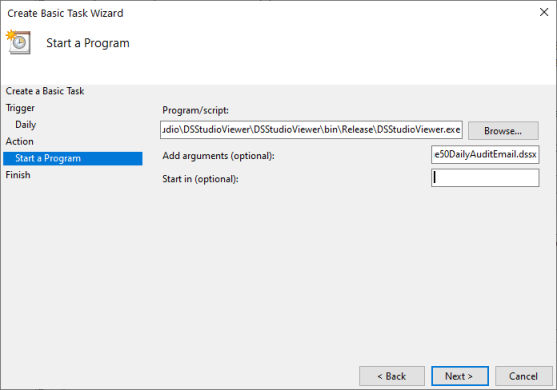
Here is where we need our information from the DSStudio Viewer Report Options Screen.
 First select the Program/script: field an <Ctrl> v (paste) the EXE Info into the field.
Now go back to the DSStudio Viewer screen and click in the FileName Field and <Ctrl> a and <Ctrl> c.
Come back to the Task Scheduler and Select the Add arguments (optional) field and <Ctrl> v. This will paste the report filename into the arguments field.
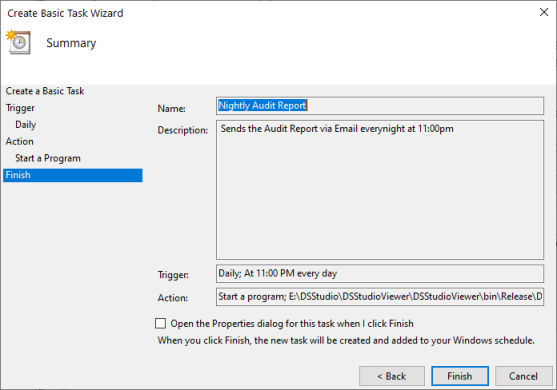
That’s it click Finish to end and exit the Task Scheduler. Now sit and wait for your reports to appear at the time you requested.
